
Rachel Tomlinson, Beauty Editor.
It is day four, not day fourteen, and the polish is already lifting at the cuticle line. You pick at the edge anyway, even though you know better, and a thin layer of your own nail comes away with it. Somewhere between the salon chair and the drugstore shelf, something about gel polish stopped making sense. Why does one bottle last two weeks and another barely survive a load of laundry? The honest answer has less to do with the brand on the label and more to do with chemistry you can learn to spot yourself. One fact worth knowing before anything else: a full, even cure under the right lamp affects gel wear more than the price of the bottle does.
- Cure time matters more than price. An under-cured gel layer stays soft underneath a hard shell, which is why polish can look fine on day one and peel by day four.
- Nail prep decides whether polish sticks at all. Oil, lotion, or leftover cuticle skin on the plate breaks the bond before the first coat goes on.
- Peeling off gel, rather than soaking it off, is what thins and weakens the nail. The damage people blame on gel polish is usually damage from the removal method.
Why Gel Polish Behaves Differently From Regular Polish
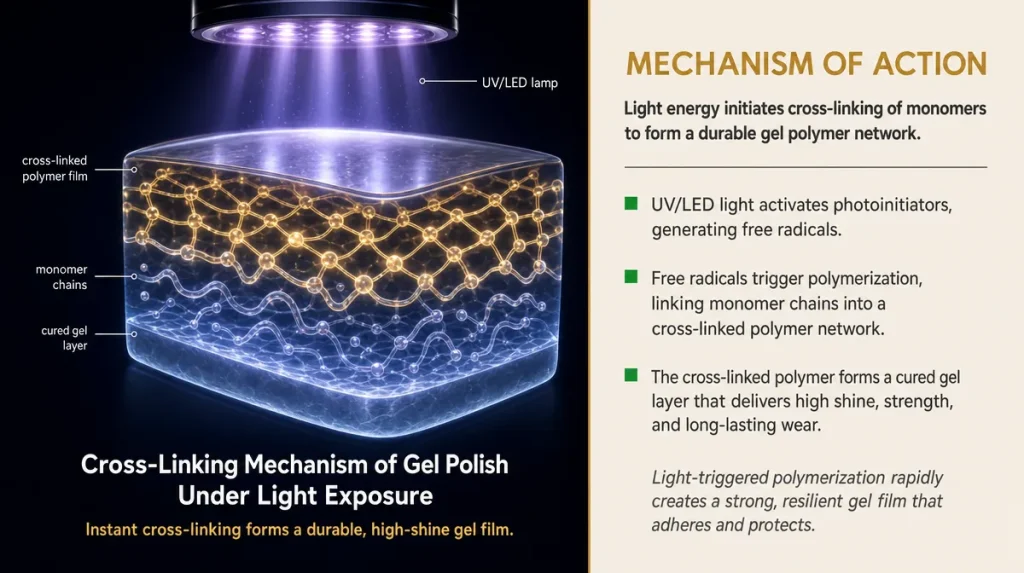
Regular nail polish dries by evaporation. The solvent leaves, the film hardens, and that is the whole story. Gel polish works on a completely different principle: it cures, meaning the liquid resin undergoes a chemical reaction triggered by light.
Think of two-part epoxy glue, the kind that comes in a double syringe. On its own, neither part hardens. Mixed and exposed to air, they link together into something rigid. Gel polish is similar in spirit, except the trigger is a specific wavelength of UV or LED light rather than a mixing step. That light energy causes short molecular chains, called monomers and oligomers, to snap together into long, cross-linked chains. The result is a flexible but durable plastic film bonded to the nail surface.
This is also why gel polish cannot simply air-dry. Skip the lamp, or cure for too short a time, and the chains never fully link. The surface may look glossy within seconds, but underneath it stays soft, which is exactly why a seemingly finished manicure can smudge against a car seat or dent under a fingernail an hour later.
Reading The Base Coat Label Before Anything Else
The base coat, not the color, is the part doing the structural work. Its job is to form a chemical bridge between the natural nail, which is mostly keratin, and the gel layer, which is essentially plastic. Those two materials do not want to stick to each other on their own.
Formulas built for adhesion typically rely on methacrylate-based bonding agents, sometimes described on packaging as adhesion promoters. This is one of the few places where an ingredient detail genuinely predicts performance: a base coat without an adhesion agent will look identical in the bottle but lift within days, regardless of how carefully the rest of the manicure is done.
Marketing language around base coats tends to focus on secondary claims: strengthening, vitamin content, nail health. These may offer a small cosmetic benefit, but they do not replace the adhesion chemistry underneath. If a product description only talks about shine and nourishment and never mentions bonding or adhesion, it is reasonable to ask what the base coat is actually built to do.
Prepping The Nail Plate Before Polish Touches It
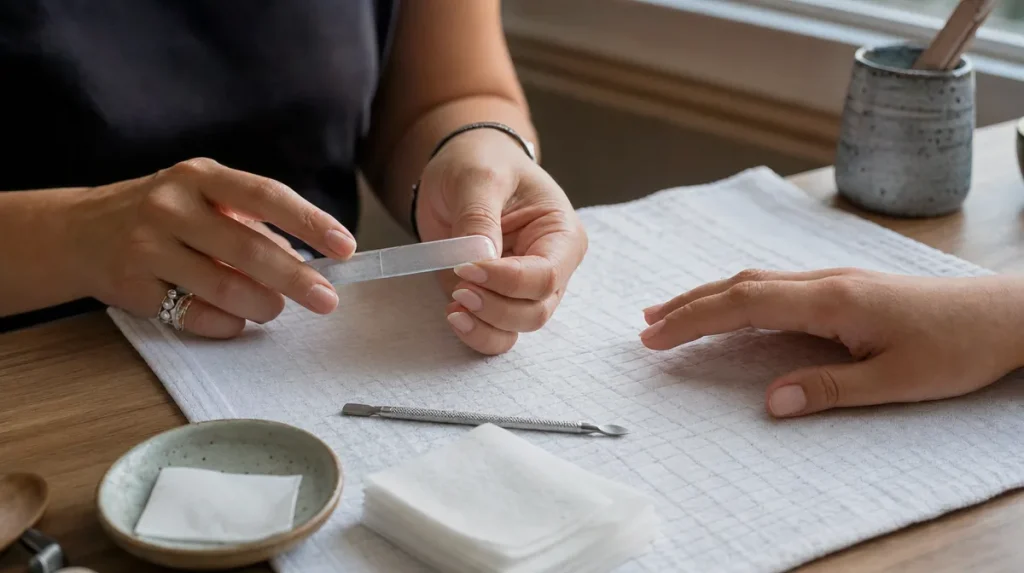
Most lifting complaints trace back to this step, not to the polish itself. Natural oils, hand lotion, and the thin layer of dead skin that clings to the nail plate all sit between the base coat and the keratin surface. Gel adhesive cannot bond to oil.
The method salons use, and one worth repeating at home, is simple: wash hands with plain soap, push back the cuticle gently rather than cutting it, lightly buff the shine off the nail surface with a fine-grit buffer, then wipe the entire nail with isopropyl alcohol on a lint-free pad. That last wipe removes the oily residue a regular hand wash leaves behind.
A common mistake is skipping the buffing step because the nail already looks smooth. Smooth is the problem: gel needs microscopic texture to grip onto, similar to how primer gives paint something to hold onto on a glossy wall. Another frequent error is applying lotion right before polishing, undoing the alcohol wipe entirely.
Self-test: run a clean, dry finger across a freshly prepped nail. It should feel slightly matte, almost chalky, not slick. Slick means oil is still present and the manicure is likely to lift early regardless of which polish goes on next.
Curing Time And Lamp Wattage: What The Numbers Actually Mean
UV lamps and LED lamps cure gel through the same cross-linking process, but at different wavelengths, roughly 365 nanometers for UV and 405 nanometers for most LED units. LED lamps generally cure faster because the wavelength and intensity are tuned closely to the photoinitiators most gel formulas use.
Marketing sometimes implies that a higher-wattage lamp is automatically better. Wattage affects speed more than final cure quality. A 48-watt LED lamp and a 36-watt LED lamp can both fully cure the same gel, just on different timers; what matters is matching the cure time on the polish label to the lamp actually being used, not assuming more watts means a safer or stronger result.
The American Academy of Dermatology has published general guidance noting that nail lamps emit UV radiation and recommending sun protection on the hands before use, similar to other UV exposure. This is public safety guidance, not a product endorsement, and it is a reasonable habit regardless of which lamp a salon or home kit uses.
Under-curing is the more common practical problem. It happens when someone pulls their hand out of the lamp a few seconds early, or when a thick, uneven coat shadows part of the nail from the light. The surface skins over and looks cured; the gel underneath stays tacky and will visibly dent or smear within a day.
Judging Pigment And Viscosity Before You Buy
A bottle of gel polish reveals a surprising amount before it ever touches a nail. Tilt it and watch how the liquid moves. A well-balanced gel should flow slowly and evenly, closer to honey than to water. Polish that runs thin and watery often needs three or four coats to look opaque, which defeats the point of a quick gel manicure and increases the odds of under-curing a thick final layer.
Pigment load is the other variable worth checking, and it is visible on the brush itself. A heavily pigmented gel coats the brush densely and leaves a solid, even stripe on the first swipe across the bottle neck. A thin, streaky stripe is a reasonable sign that full opacity will take extra coats.
None of this requires a lab. It is a thirty-second shelf test: tilt, watch the flow, check the brush stripe. Color names, seasonal packaging, and claims like “salon-quality” on the label say nothing about either property.
The Mistakes That Shorten Gel Wear
Three habits account for most early chipping, and none of them involve the polish brand.
The first is applying coats too thickly in an attempt to get full color in one pass. Thick gel cures unevenly, since light cannot penetrate as deeply, leaving a soft core under a hardened surface.
The second is skipping the cap coat, the thin top layer swiped across the very edge of the nail tip. Without it, the gel edge is exposed to friction from keys, zippers, and dishwater, and that edge is where lifting almost always starts first.
The third is touching the cuticle or skin with base coat or color. Any gel that lands on skin cannot bond properly there, and it creates a weak point that can peel inward toward the nail itself. A thin margin of bare nail at the cuticle line, about a millimeter, gives the polish room to cure without touching skin.
A useful habit: after each coat, glance at the nail from the side under a light. A thick coat shows visible ridges and pooling near the cuticle. A properly thin coat looks almost translucent before curing.
Soak-off Versus Peeling: The Real Damage Mechanism
Gel polish is designed to be removed with acetone, not pulled off. Soaking breaks down the cross-linked structure from the outside in, loosening the bond between the gel film and the nail plate until it lifts away in one piece.
Peeling works very differently. Because the gel is bonded more strongly to the nail surface than the nail’s own outer layers are bonded to each other, pulling off a piece of gel polish can take a thin layer of keratin with it. This is the actual mechanism behind the thin, flaky, weak nails many people associate with gel polish itself. A 2019 study in a dermatology journal examining nail damage patterns found that improper removal, rather than the gel chemistry, accounted for the majority of reported nail thinning among regular gel users.
The standard soak-off method: buff off the top shine, soak a cotton pad in acetone, press it against the nail, and wrap the fingertip in foil to hold it in place for roughly ten to fifteen minutes. The softened gel should slide off with gentle pressure from a wooden cuticle stick, never scraped or pried.
When To Judge Whether A Polish Is Actually Good
Day one is the wrong time to evaluate a gel manicure. Everything looks glossy and intact at first regardless of formula quality. The real test window is days three through ten, when friction, water exposure, and daily hand use start to expose any weakness in prep, application, or cure.
A simple self-test: paint one hand as usual and check it daily. Note the day lifting first appears at the cuticle edge, the day any chipping shows at the free edge, and whether the color itself has dulled or yellowed under the topcoat. A gel manicure that holds clean edges through day ten, with only minor growth visible at the base, suggests the prep, cure, and product all did their job. Lifting by day three or four almost always points back to prep or cure time, not the pigment itself.
It also helps to separate two different failures that get blamed on the same thing. Chipping at the tips usually means a missing or thin cap coat. Lifting as a whole chunk near the cuticle usually means oil, lotion, or skin contact during application. Knowing which one happened tells you what to fix next time, rather than assuming the whole product failed.
Key Takeaways
Gel polish is a light-cured plastic film, not a fast-drying paint, and most of what determines how long it lasts happens before the color ever goes on. Clean, oil-free nail prep and a full, accurate cure matter more than the price or brand of the polish. When a manicure fails early, the cause is almost always traceable: wrong cure time, skipped cap coat, or oil left on the nail. When it is time to take the polish off, soaking it away protects the nail; peeling it off does the damage people usually blame on gel polish itself.
A Quick Checklist Before Your Next Manicure
- Wash hands, then wipe nails with isopropyl alcohol right before polishing, even after washing
- Lightly buff the nail surface so it feels matte, not slick
- Apply thin coats only, checking each one from the side under a light before curing
- Cap the free edge of the nail with every coat, including the top coat
- Match cure time to the specific lamp being used, not just the polish label’s general suggestion
- Track wear daily from day three onward rather than judging the manicure on day one
- Soak off with acetone and foil, never peel or pick at lifting edges
This article is for general information only and is not a substitute for professional nail or medical advice.
Individual results vary depending on nail health, product choice, and application technique.